DIY Photo Slide Projector
2 11 Share TweetI’ll show you how to build a lo-fi projector to display your photo slides on a huge wall.
You can find a full explanation here. There you can also download the PDF with all the photos and explanations.
The lo-fi aspect is crucial to lineup to the lomography way. The fact that the project is also cheap is a plus! Sadly, the Ikea lamp I’m using (isbrytare) is out of stock and no more produced. You have to find it in used stores or hope that Ikea will start again producing this beautiful lamp. Its cost was about $40.
The lamp became a present for the birthday of a very good photographer and friend: Fizza)

- isbrytare lamp from Ikea (not anymore in production.. find it on ebay)
- plans to build the adapter (downloadable here, bottom of step 2)
- something to cut wood if you are planning to build it by yourself OR an account on an online laser-cut service (I used Ponoko)
- vinilic glue
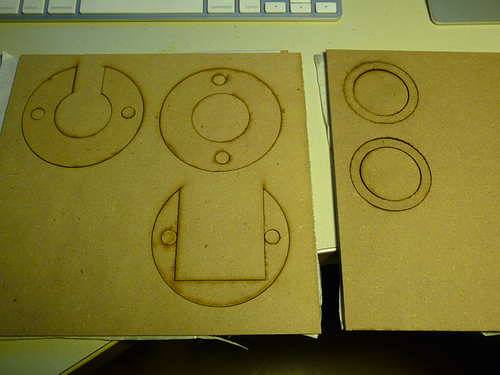

In order to build your slide holder download the two files attached to this step.
Now you have to choose how to proceed:
1. You can give the file to an online laser-cut services and let them to made the work for you. They will precisely cut the pieces and send them to your home. I suggest you to use 1/8 inches wood (mine is actually 3 millimeters).
2. You can print the files on paper and glue the paper on thin wood as a guide for your cutting lines
If you choose the former, I suggest you to choose ponoko.com simply because files are already formatted for that site.
If you choose the latter you maybe need some more info:
A file with SVG extension has a particular format named VECTORIAL that allows you to describe an image with mathematical formulas. In other words, you can zoom the image as you wont without loosing quality. If you do not know how to open these file just download the open-source, multi-platform and free software http://inkscape.org/


Since we are using wood to assemble the holder we need vinilic glue.
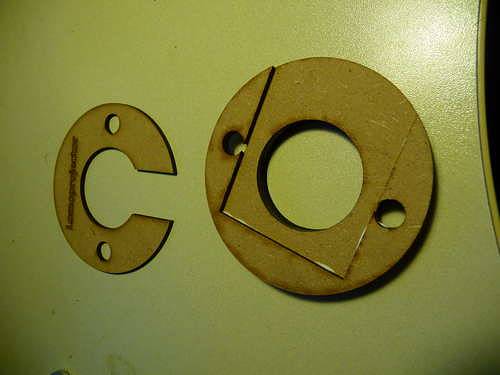
Step 1: glue part A to part B. Be careful to not exceed with the glue and to align the center hole of the two pieces
Step 2: turn the obtained piece and glue part C. Be careful to align the central hole and the side holes. (the order of the wood layers should be A – B – C)
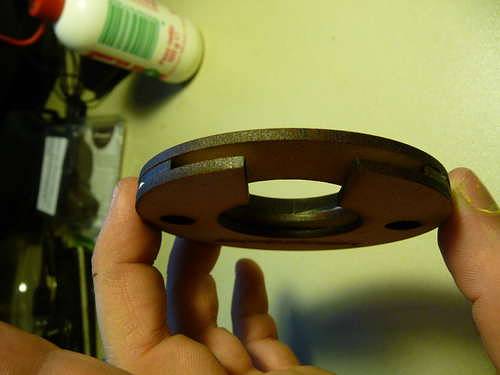
Step 3: glue part D over part C again being careful to align holes
Step 4: leave the glue to harden for 24 hours
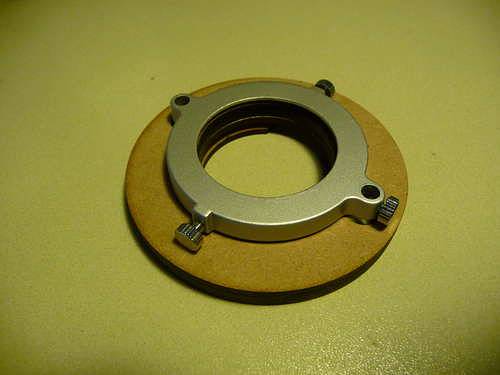
Put the filter holder of the lamp over Part A of the slide holder.
Fasten the to 2 screws until the two pieces are firmly together.

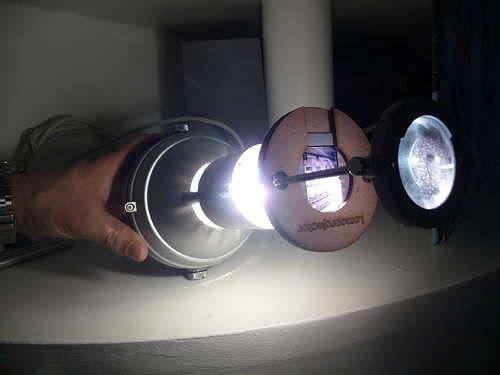
Assemble the lamp putting the slide holder on the rails first, then the Fresnel lens. For now you do not want to fasten the screws.
Power the lamp and point it to a big wall. Move backward and forward the 2 pieces until the image on the wall is on focus
I also added a wood floor to the lamp so that it can stand by itself.
Enjoy your new photo-slide projector!
written by derte84 on 2011-06-23 #gear #tutorials #slide #tutorial #tipster #lomography #projector #handicraft


2 Comments